This PR changes the syntax highlighting theme we use in the docs. The reason for the change is that the previous theme we used didn't have sufficient color contrast between its comment strings and its background. ## Options I decided to use the Oceanic Next color theme that is included with docusaurus. Looking through, the only other dark theme that also passed AA contrast checks was VS Dark. The reason I picked Oceanic over VS Dark is simply that I like it better. For demonstration, here's what the Oceanic theme looks like: 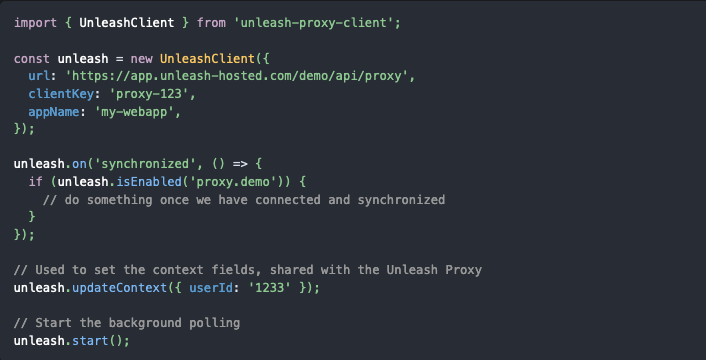 And here's the VS Dark theme: 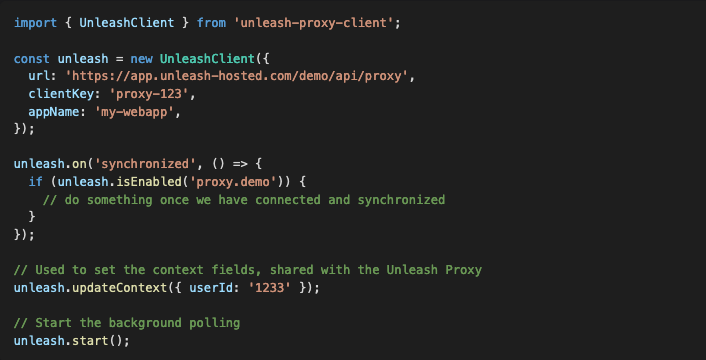 ## Bonus change The PR also includes a fix to render a pricing admonition correctly. It's not related to the PR, but I noticed it rendered incorrectly while I was working on it.
14 KiB
| title |
|---|
| Quickstart |
In this section we will attempt to guide you in order to get started with Unleash easily. There are multiple options to get started with Unleash, browse the headings to find the method that works best for you.
I just want to get started creating toggles without much setup
Usually, you'll need to set up an Unleash instance in order to work with Unleash. However, for testing purposes we have set up a demo instance that you can use in order to test out different use-cases before setting up your own instance. You can find the demo instance admin panel here: https://app.unleash-hosted.com/demo/
NOTE: This is a demo instance set up with the Enterprise version. Some of the functionality may be enterprise specific, but everything we cover here is also available in open source.
I want to test toggles in a client side environment
To test toggles in a client-side environment, we recommend that you use the front-end client API. Client-side SDKs act a little differently from server-side SDKs, so the regular client API won't work for this. For more advanced setups, you can also use the Unleash proxy, which offers greater flexibility than the front-end API, but at the cost of increased complexity.
Create your first toggle
In order to create a toggle through the UI, you can follow this guide. Once you have created your feature toggle, you are ready to connect your application using an SDK.
Connecting a client-side SDK to Unleash
If you have set up your own Unleash instance and are using the front-end API, then create a front-end token and use <your-unleash-instance>/api/frontend as the API URL.
If you don't have your own Unleash instance set up, you can use the Unleash demo instance's proxy. In that case, the details are:
- API URL:
https://app.unleash-hosted.com/demo/api/proxy - Client key:
proxy-123
Now you can open your application code and connect through one of the client-side SDKs.
The following example shows you how you could use the JavaScript SDK to connect to the Unleash demo proxy:
import { UnleashClient } from 'unleash-proxy-client';

const unleash = new UnleashClient({
  url: 'https://app.unleash-hosted.com/demo/api/proxy',
  clientKey: 'proxy-123',
  appName: 'my-webapp',
});

unleash.on('synchronized', () => {
  if (unleash.isEnabled('proxy.demo')) {
    // do something once we have connected and synchronized
  }
});

// Used to set the context fields, shared with the Unleash Proxy
unleash.updateContext({ userId: '1233' });

// Start the background polling
unleash.start();
I want to test toggles in a back-end environment
Create your first toggle
In order to create a toggle through the UI, you can follow this guide. Once you have created your feature toggle, you are ready to connect your application using an SDK.
Connecting to the Unleash instance from your app
Connection details:
Api URL: https://app.unleash-hosted.com/demo/api/
Secret key: 56907a2fa53c1d16101d509a10b78e36190b0f918d9f122d
Curl command test credentials and retrieve feature toggles:
curl https://app.unleash-hosted.com/demo/api/client/features \
-H "Authorization: 56907a2fa53c1d16101d509a10b78e36190b0f918d9f122d";
Now you can open up your application code and create a connection to Unleash using one of our SDKs. Here's an example using the NodeJS SDK:
const { initialize } = require('unleash-client');
const unleash = initialize({
  url: 'https://app.unleash-hosted.com/demo/api/',
  appName: 'my-app-name',
  instanceId: 'my-unique-instance-id',
  customHeaders: {
    Authorization: '56907a2fa53c1d16101d509a10b78e36190b0f918d9f122d',
  },
});

unleash.on('synchronized', () => {
  // Unleash is ready to serve updated feature toggles.

  // Check a feature flag
  const isEnabled = unleash.isEnabled('some-toggle');

  // Check the variant
  const variant = unleash.getVariant('app.ToggleY');
});
Now you can fetch the feature toggle you created and try turning it on / off in your code.
I want to setup my own instance for testing purposes
If you want to set up your own instance for testing purposes you can easily do so by using one of our premade setup kits for Heroku or DigitalOcean.
:::info Pricing
Both DigitalOcean and Heroku will charge you for running Unleash on their services. However, if you use the DigitalOcean link below and are a new user, you will receive $100 in free credits.
:::
Deploy a paid version of Unleash to Heroku

Deploy a paid version of Unleash to DigitalOcean
:::tip Free credits
You'll receive $100 in free credits if you are a new DigitalOcean user using this link.
:::

Accessing your new instance
Once you have set up the new instance, follow the URL provided by either Heroku or DigitalOcean and it will take you to the application login screen.
Input the following credentials to log in:
username: admin
password: unleash4all
Create your first toggle
In order to create a toggle through the UI, you can follow this guide. Once you have created your feature toggle, you are ready to connect your application using an SDK.
If you'd like to create your feature toggles with code, you can hit the create feature endpoint with the following command:
CRUD operations require an admin API key. For security reasons we have split the admin and client API into separate APIs. You can view how to create API keys in the next section of this guide. Make sure you create client keys for use in SDKs and restrict Admin api key usage.
curl -H "Content-Type: application/json" \
     -H "Authorization: MY-ADMIN-API-KEY" \
     -X POST \
     -d '{
  "name": "my-unique-feature-name",
  "description": "lorem ipsum..",
  "type": "release",
  "enabled": false,
  "stale": false,
  "strategies": [
    {
      "name": "default",
      "parameters": {}
    }
  ],
  "variants": [],
  "tags": []
}' \
http://CHANGEME/api/admin/features
Connect your SDK
Next, find the navigation, open up the Admin panel and find the API Access tab. Click the "Add new api key" button and create a client key. This key can be used to connect to the instance with our SDKs.
You can find more information about API keys here.
Now that you have your API key created, you have what you need to connect to the SDK (NodeJS example):
const { initialize } = require('unleash-client');
const unleash = initialize({
  url: 'https://your.heroku.instance.com/api/',
  appName: 'my-app-name',
  instanceId: 'my-unique-instance-id',
  customHeaders: {
    Authorization: 'YOUR_API_KEY_HERE',
  },
});

unleash.on('synchronized', () => {
  // Unleash is ready to serve updated feature toggles.

  // Check a feature flag
  const isEnabled = unleash.isEnabled('some-toggle');

  // Check the variant
  const variant = unleash.getVariant('app.ToggleY');
});
I want to run Unleash locally
Run Unleash with Docker
The easiest way to run unleash locally is using docker.
:::tip
Each container that runs in your local Docker instance must have a unique name. If you've run these commands before, you can either start the containers again (docker start ${CONTAINER_NAME}) or remove them (docker rm ${CONTAINER_NAME}) and run the commands again.
:::
- Create a network by running
docker network create unleash - Start a postgres database:
docker run \
  -e POSTGRES_USER=unleash_user \
  -e POSTGRES_PASSWORD=some_password \
  -e POSTGRES_DB=unleash \
  --network unleash \
  --name postgres \
  postgres
- Start Unleash via docker:
docker run \
  -p 4242:4242 \
  -e DATABASE_HOST=postgres \
  -e DATABASE_NAME=unleash \
  -e DATABASE_USERNAME=unleash_user \
  -e DATABASE_PASSWORD=some_password \
  -e DATABASE_SSL=false \
  --network unleash \
  --name unleash \
  --pull=always unleashorg/unleash-server
Click here to see all options to get started locally.
Accessing your new instance
Once you have the local instance running on localhost, input the following credentials to log in:
username: admin
password: unleash4all
Create your first toggle
In order to create a toggle through the UI, you can follow this guide. Once you have created your feature toggle, you are ready to connect your application using an SDK.
If you'd like to create your feature toggles with code, you can hit the create feature endpoint with the following command:
CRUD operations require an admin API key. For security reasons we have split the admin and client API into separate APIs. You can view how to create API keys in the next section of this guide. Make sure you create client keys for use in SDKs and restrict Admin api key usage.
curl -H "Content-Type: application/json" \
     -H "Authorization: MY-ADMIN-API-KEY" \
     -X POST \
     -d '{
  "name": "my-unique-feature-name",
  "description": "lorem ipsum..",
  "type": "release",
  "enabled": false,
  "stale": false,
  "strategies": [
    {
      "name": "default",
      "parameters": {}
    }
  ],
  "variants": [],
  "tags": []
}' \
http://CHANGEME/api/admin/features
Connect your server-side SDK
Find the navigation, open up the Admin panel and find the API Access tab. Click the "Add new API key" button and create a client key. This key can be used to connect to the instance with our SDKs.
You can find more information about API keys here.
Now that you have your API key created, you have what you need to connect to the SDK (NodeJS example):
const { initialize } = require('unleash-client');
const unleash = initialize({
  url: 'https://localhost:4242/api/',
  appName: 'my-app-name',
  instanceId: 'my-unique-instance-id',
  customHeaders: {
    Authorization: 'YOUR_API_KEY_HERE',
  },
});

unleash.on('synchronized', () => {
  // Unleash is ready to serve updated feature toggles.

  // Check a feature flag
  const isEnabled = unleash.isEnabled('some-toggle');

  // Check the variant
  const variant = unleash.getVariant('app.ToggleY');
});
Connecting a client-side SDK to your instance
The easiest way to connect a client-side SDK to your Unleash instance is to use the front-end API. You'll need to:
- Create a front-end API token (How do I create API tokens?)
- Configure CORS to allow your SDK to connect. For testing, we recommend allowing all origins (
*). - Point your app at
<your-unleash-instance>/api/frontend.
The section on using the Unleash front-end API has more details for how you configure these settings.
As an example, here's how you would connect the JavaScript SDK to a local Unleash instance available at localhost:4242
import { UnleashClient } from 'unleash-proxy-client';

const unleash = new UnleashClient({
  url: 'http://localhost:4242/api/proxy',
  clientKey: '<your-front-end-api-token>',
  appName: 'my-webapp',
});

// Start the background polling
unleash.start();
Run Unleash and the Unleash proxy with Docker
We designed the front-end API to make it as easy as possible to get started and to cover basic use cases for front-end clients. However, if you need more flexibility, then you can also use the Unleash proxy.
Follow the steps outlined in the run Unleash with Docker section to get the Unleash instance up and running. Once you have done that, you need to first get an API key from your Unleash instance and then use that API key when starting the Unleash proxy.
-
Get an API key.
To get an API key, access your Unleash instance in a web browser. First, navigate to the API access screen.

Next, create an API key with these details
- name: proxy-key (this can be whatever you want)
- token type: client
- project: all
- environment: select your preferred environment (this option is only available in Unleash 4.3 and later)
Copy the API key to your clipboard. You'll need it in the next step.
:::note
Depending on whether you have the environments feature enabled or not, the API key will look a little different. If you don't have environments enabled, it'll just be a 64 character long hexadecimal string (for instance
be44368985f7fb3237c584ef86f3d6bdada42ddbd63a019d26955178). If you do have environments enabled, the key will be prefixed with the project and the environment that the key is valid for. It'll use the format<project>:<environment>.<key>, e.g.demo-app:production.be44368985f7fb3237c584ef86f3d6bdada42ddbd63a019d26955178.Regardless of which format your string uses, do not modify it.
:::
-
Start the Unleash proxy
Start a container with the Unleash proxy by running the following command. Replace
${API_KEY}with the key you created in the following step.docker run \ -e UNLEASH_PROXY_CLIENT_KEYS=some-secret \ -e UNLEASH_URL='http://unleash:4242/api/' \ -e UNLEASH_API_TOKEN='${API_KEY}' \ -p 3000:3000 \ --network unleash \ --name unleash-proxy \ --pull=always unleashorg/unleash-proxy -
Test the proxy
To make sure the proxy is running successfully, you can test it by running the following command:
curl http://localhost:3000/proxy -H "Authorization: some-secret"